


Have you ever ordered a shirt online, only for it to arrive too tight in the shoulders or too baggy at the waist? Knowing how to find the right size for casual shirts is the key to avoiding disappointment and building a wardrobe that looks and feels great. The process involves taking a few key body measurements, comparing them to a brand’s specific size chart, and understanding the nuances of different shirt fits.
To find your perfect shirt size, you’ll need to measure the fullest part of your chest, your natural waist, the width of your shoulders, and your sleeve length. Once you have these numbers, you can confidently reference any brand’s sizing guide to select the option that best matches your body. This ensures a comfortable and stylish fit every time you shop, eliminating the guesswork and hassle of returns.
Why Finding Your Perfect Shirt Fit Matters
Finding the perfect fit for your casual shirts goes beyond simple aesthetics; it directly impacts your comfort and confidence. A shirt that fits correctly allows for a full range of motion without pulling or bunching, making your day-to-day activities more comfortable. Whether you’re at a casual brunch or an informal business meeting, you won’t be distracted by tight armholes or buttons straining at the chest.
Moreover, a well-fitting shirt presents a polished and put-together appearance. It complements your body shape rather than hiding or constricting it. An ill-fitting shirt, whether too large or too small, can look sloppy and detract from your overall style. Taking the time to find your ideal size is an investment in your personal presentation, ensuring you always look your best with minimal effort.
To ensure you get an accurate size, it’s essential to take a few core body measurements. These measurements are the foundation for comparing your body to a brand’s sizing standards and are crucial for successful online shopping. Having these numbers on hand will transform your ability to choose the right garment every time.
Chest Measurement
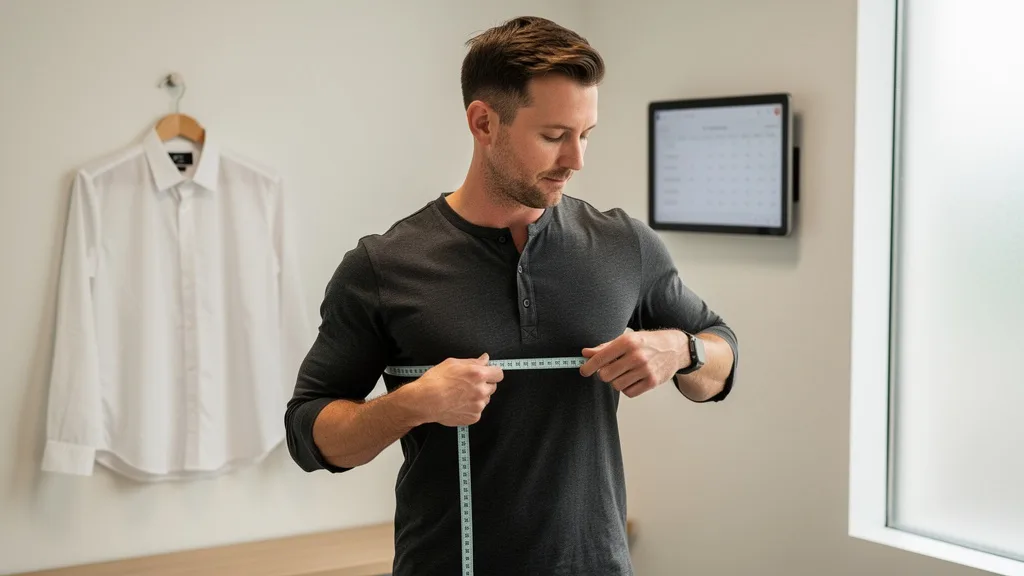
The chest measurement is one of the most critical factors for a comfortable shirt fit. To measure your chest, stand up straight and relax your arms at your sides. Wrap a soft measuring tape around the fullest part of your chest, typically just under your armpits and across your shoulder blades. Ensure the tape is level all the way around and snug, but not so tight that it constricts your breathing.
This measurement determines whether a shirt will be too tight or too loose across your torso. A shirt that is too tight in the chest will cause the buttons to pull and can restrict movement, while one that is too loose will look billowy and unflattering. Getting this number right is the first step toward a great fit.
Waist Measurement
Your waist measurement helps determine the taper and overall shape of the shirt. To find your natural waistline, locate the narrowest part of your torso, which is usually just above your belly button. Wrap the measuring tape around this point, keeping it parallel to the floor.
For a comfortable fit, don’t suck in your stomach. Breathe normally and allow the tape to sit comfortably against your skin without digging in. This measurement is especially important for slim fit or athletic fit shirts, which are designed to be more contoured through the midsection.
Shoulder Width
Measuring your shoulder width ensures the shirt seams will sit correctly on your body. This measurement is best taken with the help of a friend, but it can be done alone. Measure from the outside edge of one shoulder bone (the acromion bone) across your back to the outside edge of the other shoulder bone.
Keep the tape measure straight and taut across the top of your back. The shoulder seams of a well-fitting shirt should align perfectly with the points you measured. If the seams hang off your shoulders, the shirt is too big; if they sit closer to your neck, it’s too small.
Sleeve and Shirt Length
Sleeve length is measured from the center of the back of your neck, over the top of your shoulder, and down to your wrist bone. Bend your elbow slightly to account for movement. This measurement is often listed as a range on dress shirts (e.g., 34/35) but is just as important for casual shirts to avoid sleeves that are too long or too short.
Shirt length is measured from the highest point of the shoulder (where the collar meets the shoulder seam) down to the desired hemline. For a casual shirt meant to be worn untucked, the hem should typically end around mid-zipper. For shirts you plan to tuck in, you’ll need a bit more length to ensure it stays put.
How to Measure for Your Shirt Size at Home
You don’t need a professional tailor to find your shirt size. With a few simple tools and a clear process, you can easily get accurate measurements at home. This empowers you to shop online with confidence, knowing you’re choosing a size that will fit you well.
Step 1: Gather Your Measurement Tools
Before you begin, you’ll need a few basic items. The most important tool is a soft, flexible measuring tape, also known as a tailor’s tape. If you don’t have one, you can use a piece of non-stretchy string or ribbon and a standard ruler or yardstick. You will also need a pen and paper or a notes app on your phone to record your measurements.
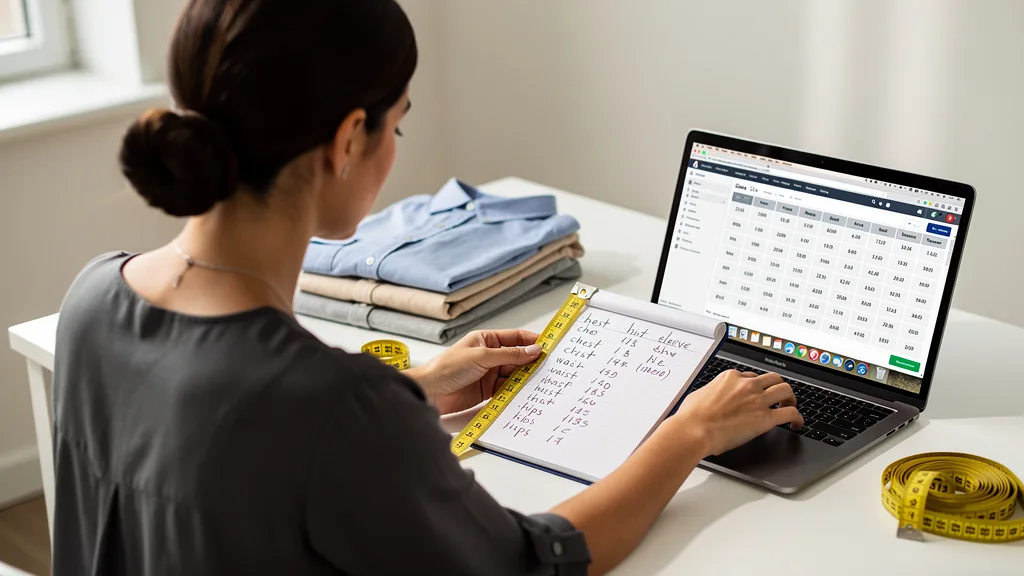
It’s also helpful to wear a thin, fitted t-shirt while measuring. This prevents bulky clothing from adding extra inches to your measurements and ensures the most accurate results. Finally, stand in a relaxed, natural posture in front of a mirror to help you see if the tape is level.
Step 2: Take Your Core Body Measurements
Following the instructions from the previous section, systematically take your core measurements. Start with your chest, then your waist, shoulders, and finally your sleeve length. Take each measurement twice to ensure accuracy and write down the numbers clearly.
Remember to keep the tape measure snug but not tight. You should be able to fit one finger between the tape and your body. Being consistent with your technique will give you a reliable set of numbers to use when consulting a size chart.
Step 3: Measure an Existing Well-Fitting Shirt
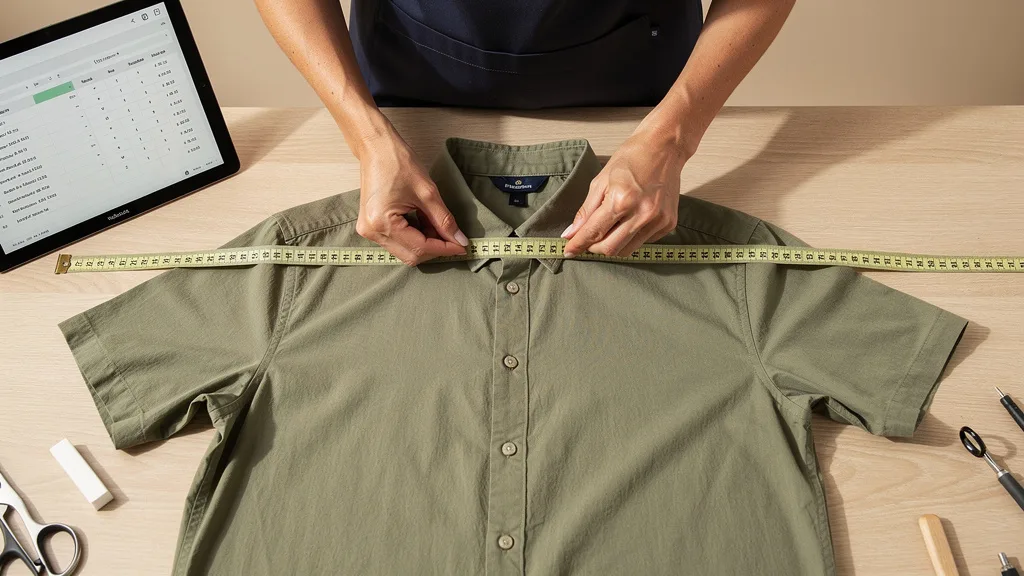
An excellent alternative to measuring your body is to measure a casual shirt that you already own and love the fit of. Lay the shirt flat on a clean surface, like a table or the floor, and smooth out any wrinkles. This method provides a direct comparison for the dimensions you see on online size charts.
Measure the chest by measuring from armpit to armpit and doubling the number. Measure the shoulder width from seam to seam across the back. For the length, measure from the top of the collar down to the hem. These measurements can be even more reliable than body measurements, as they reflect the final dimensions of a garment you already know fits well.
Using a Size Chart to Find the Right Size
Once you have your measurements, the next step is to interpret a brand’s size chart. These charts are the bridge between your body’s dimensions and the brand’s specific sizing. Learning how to read them correctly is essential for making the right choice.
How to Read Standard and Brand-Specific Size Charts
Most size charts are organized in a table, with sizes like Small (S), Medium (M), and Large (L) listed alongside corresponding body measurements in inches or centimeters. Compare your chest, waist, and shoulder measurements to the numbers in the chart. Your chest measurement is often the most important, so start there. If you need help converting units, a comprehensive shirt size chart guide can be very useful.
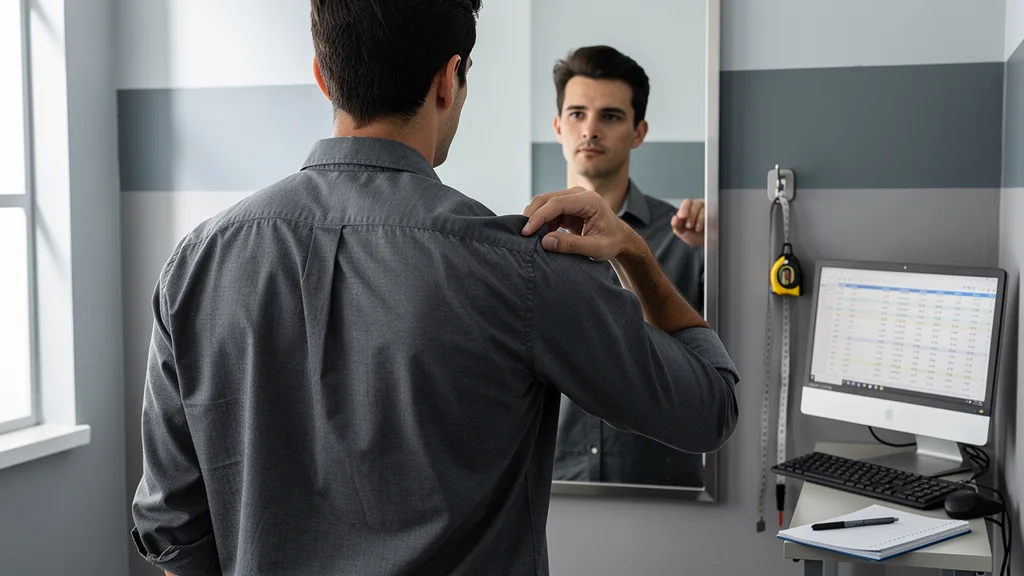
It’s crucial to remember that there is no universal sizing standard; a Medium from one brand may fit like a Large from another. Always refer to the specific size chart for the brand you are purchasing from. Some brands also provide garment measurements in addition to body measurements, which you can compare to the well-fitting shirt you measured earlier. For example, you can look up details on what an M size in number means for a particular brand.
“Always check the brand’s specific size chart before purchasing. A few minutes of research can save you the hassle of a return and ensure you get the perfect fit on the first try.”
What to Do When You Fall Between Sizes
It’s common to find that your measurements fall between two different sizes. For example, your chest might align with a size Medium, but your waist might be closer to a Large. In this situation, your decision should be based on the type of fit you prefer and the cut of the shirt.
As a general rule, it’s often best to size up, especially for casual shirts where a little extra room is more acceptable than a fit that’s too tight. A slightly larger shirt can be tailored for a more precise fit, whereas a shirt that is too small cannot be altered. If you’re considering a slim-fit shirt, prioritizing the larger size based on your chest or shoulder measurement is usually the safest bet. For those needing larger options, consulting a XXXL size chart can provide more specific guidance.
How to Check if a Casual Shirt Fits Correctly
Once you have your new shirt, it’s time for the final fit check. Trying on the shirt and performing a few simple tests will confirm whether you’ve found the right size. Answering the question of ‘How do you know if a shirt is the right size?’ involves checking several key areas for a balanced and comfortable fit.
The Shoulder Seam Test
The first thing to check is the shoulder seams. The seam where the sleeve attaches to the body of the shirt should sit perfectly at the edge of your shoulder bone. If the seam is sliding down your arm, the shirt is too big. If it’s creeping up toward your neck, the shirt is too small.
This is a non-negotiable fit point because it’s difficult and expensive to alter. Correct shoulder alignment dictates how the rest of the shirt drapes on your body, so getting this right is fundamental to a good fit. Properly aligned seams create a clean, sharp silhouette.
Checking the Chest, Torso, and Button Strain
Next, check the fit across your chest and torso. The shirt should lie flat against your chest without pulling or creating an ‘X’ shape around the buttons. You should be able to comfortably pinch about 1-2 inches of excess fabric on either side of your chest. This ensures you have enough room to move without the shirt looking baggy.
Button up the shirt completely and check for any strain. If the placket (the strip where the buttons are) is gaping, the shirt is too tight. The fit around your torso should follow your natural shape, with a gentle taper at the waist for a more tailored look. You can find excellent examples in casual looks with jeans shirt for men that showcase a proper fit.
Proper Sleeve Length and Cuff Fit
With your arms relaxed at your sides, the shirt cuffs should end right at the base of your thumb, where your wrist and hand meet. This allows about half an inch of the shirt cuff to show when wearing a jacket. The cuffs themselves should be snug enough that they don’t slide over your hand but loose enough to accommodate a watch.
When you bend your arm, the sleeve should not pull back more than an inch or so. If it rides up your forearm significantly, the sleeves are too short. Conversely, if the sleeves bunch up at your wrist, they are too long and will look untidy.
The ‘Raise Your Arms’ Test for Shirt Length
To check the shirt’s length, perform the ‘raise your arms’ test. Lift your arms straight up above your head. If the shirt is a good fit, the hem should not rise so high that it exposes your stomach. The shirttails should stay mostly tucked in if you are wearing it that way, or they should continue to cover your waistband if worn untucked.
This test confirms that the shirt provides adequate coverage and won’t ride up during normal activity. A shirt that passes this test offers both a great look and practical comfort, ensuring you’re not constantly adjusting it throughout the day.
Common Casual Shirt Fit Types Explained
Casual shirts come in several standard fits, each designed to flatter different body types and style preferences. Understanding these categories will help you narrow down your choices and select a shirt that not only fits your measurements but also matches your desired silhouette. From slim to relaxed, there’s a fit for every body.
Slim Fit vs. Athletic Fit
A slim fit shirt is tailored to sit closer to the body. It features higher armholes and is narrower in the chest and waist, creating a sharp, modern silhouette. This fit is ideal for slender body types, as it eliminates the excess fabric that can make a regular shirt look baggy. It’s designed to highlight a lean frame.
An athletic fit, sometimes called a muscle fit, is similar to a slim fit but is designed for individuals with a broader chest and shoulders and a narrower waist. It provides more room in the upper body and arms while still tapering significantly at the waist. This cut prevents the chest from feeling tight while avoiding a billowy midsection, making it perfect for athletic builds.
| Feature | Slim Fit | Athletic Fit |
|---|---|---|
| Chest & Shoulders | Narrow, close-fitting | Wider, more room |
| Waist | Tapered | Highly tapered |
| Sleeves | Slim | More room for biceps |
| Best For | Slender body types | V-shaped, athletic body types |
Regular or Classic Fit
The regular fit, also known as classic fit, is the traditional standard for shirts. It offers a straight cut from the chest down to the waist, providing ample room for movement and comfort. The armholes are lower, and the sleeves are fuller compared to a slim fit shirt.
This timeless fit is a versatile choice that suits most body types. It prioritizes comfort and a traditional look over a highly contoured silhouette. If you prefer a more relaxed feel without excessive fabric, the classic fit is an excellent and reliable option.
Relaxed or Loose Fit
A relaxed fit or loose fit shirt offers the most generous cut. It is designed with maximum comfort in mind, featuring a wide body, broad shoulders, and very low armholes. This style provides plenty of room to move and is ideal for a very casual, laid-back aesthetic.
This fit is a good choice for larger body types or for anyone who prioritizes comfort above all else. It’s also a popular choice for certain styles, like Hawaiian shirts or overshirts, where a looser drape is part of the intended look. However, be mindful that it can look oversized if not styled intentionally.
Key Takeaways
Mastering how to find the right size for casual shirts is simple when you follow a few key steps. Here are the most important takeaways to remember for your next shopping trip:
- Measure Yourself Accurately: Your chest, waist, shoulder, and sleeve measurements are the foundation for finding a great fit. Keep these numbers handy.
- Always Check the Brand’s Size Chart: Sizing is not universal. A few moments spent checking the specific chart for the item you’re buying can prevent a poor fit.
- Measure a Well-Fitting Shirt: Using a favorite shirt as a benchmark is one of the most reliable ways to compare garment measurements online.
- Understand Different Fit Types: Knowing the difference between slim, classic, and relaxed fits helps you choose a shirt that matches your body type and style preference.
- Perform a Final Fit Check: Once the shirt arrives, test the shoulder seams, button strain, sleeve length, and overall length to confirm you’ve made the right choice.
Frequently Asked Questions
What does a 34/35 shirt size mean?
This type of sizing is most common in men’s dress shirts and refers to the sleeve length in inches. The first number (34) indicates the sleeve length for a regular arm position, while the second number (35) accounts for the length needed when your arm is bent. It means the shirt is designed to fit someone with a sleeve measurement that falls within that one-inch range.
Casual shirts are more often sized as S, M, L, but some brands do use neck and sleeve measurements. Understanding this convention is helpful when shopping across different types of shirts. Always check if the primary measurement is the neck or the chest.
What is the 3-3-3 rule for men’s clothing?
The 3-3-3 rule is a minimalist wardrobe concept, not a sizing rule. It’s a method for creating a capsule wardrobe by selecting three tops, three bottoms, and three pairs of shoes that can all be mixed and matched. This creates numerous outfit combinations from a small number of versatile pieces.
While it’s not directly related to finding your shirt size, applying this rule can encourage you to invest in a few high-quality, perfectly fitting shirts rather than a large number of ill-fitting ones. Quality and fit are more important than quantity.
How do shirt sizes vary between different brands?
Shirt sizes can vary significantly between brands due to different target demographics, design philosophies, and manufacturing standards. A size ‘Medium’ from a European brand might be cut slimmer than a ‘Medium’ from an American brand. This is known as vanity sizing, where sizes are shifted to make customers feel better.
This is why it is absolutely essential to ignore the letter on the tag (S, M, L) and instead focus on the actual measurements provided in the brand’s size chart. Never assume your size in one brand will be the same in another.
How can I find my shirt size without a measuring tape?
If you don’t have a flexible measuring tape, you can still get your measurements. Use a piece of non-stretchy string, a phone charging cable, or even a shoelace. Wrap it around your chest or waist as you would a tape measure, mark the point where it overlaps, and then lay it flat against a ruler or yardstick to find the length.
Alternatively, the most reliable method without a tape is to use a shirt that already fits you perfectly. Lay it flat and use a ruler to measure its key dimensions: chest (pit to pit x 2), shoulder width, and length. Compare these numbers to the garment measurements on a product’s size chart.
Should a casual shirt be tucked in or left untucked?
Whether you tuck in a casual shirt depends on its hemline. Shirts with an even, flat hem are designed to be worn untucked. Shirts with longer front and back ‘tails’ and a curved hem are designed with the option to be tucked in. Tucking in a shirt with a flat hem can look awkward and bunch up.
As a general rule for untucked shirts, the hem should fall somewhere between the top of your pockets and the bottom of your fly. Any longer and it can look like a dress; any shorter and it risks exposing your midriff when you move. Style and occasion also play a role in the decision.
Conclusion
Ultimately, learning how to find the right size for casual shirts transforms your shopping experience and elevates your personal style. By taking accurate body measurements, carefully reading brand-specific size charts, and understanding the characteristics of different fits, you can confidently select shirts that are both comfortable and flattering. A perfectly fitting shirt is a cornerstone of a great wardrobe, ensuring you look and feel your best in any casual setting.
Now that you’re equipped with the knowledge to find your perfect fit, it’s time to explore a collection crafted with style and comfort in mind. Discover our premium shirts, kurtas, and suits designed to provide an exceptional fit for every occasion. Explore our new arrivals and find your next favorite shirt today. SHOP NOW.