

Tired of ordering premium dress shirts online only to find the collar is too tight or the sleeves are comically long? Getting the right fit is the most critical element in looking sharp, and it all starts with two key numbers. Taking a few moments to measure correctly ensures the high-quality shirt you invest in looks and feels custom-made.
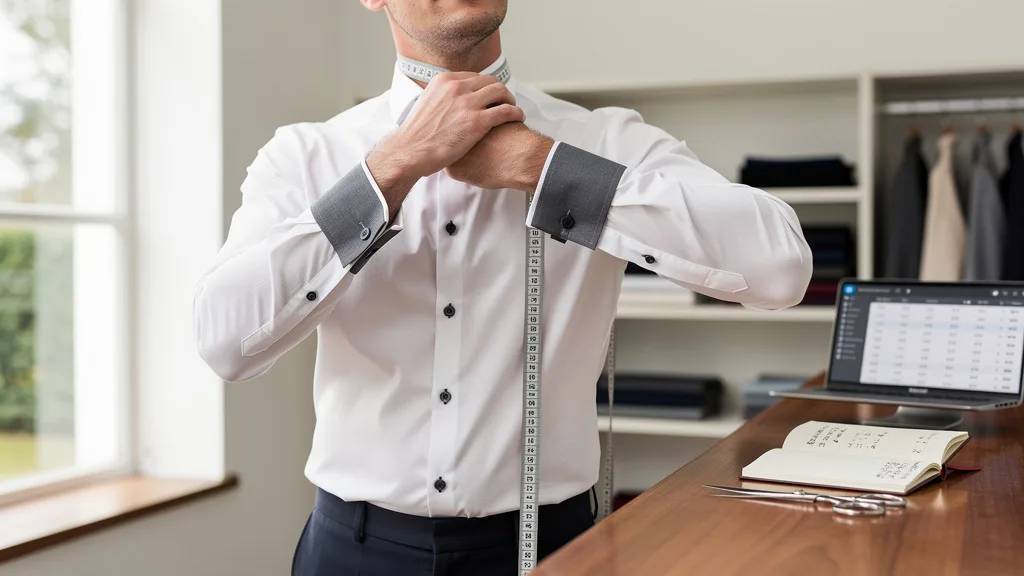
To get a perfect fit, you need to know how to measure your neck and sleeve for a premium dress shirt accurately. This involves using a flexible measuring tape to find your neck circumference just below your Adam’s apple, adding a half-inch for comfort, and measuring your sleeve from the center of your neck down to your wrist. These two measurements are the industry standard for ensuring your shirt fits perfectly from the collar to the cuff.
Why Accurate Shirt Measurements Are Essential for a Perfect Fit
Accurate measurements are the foundation of a well-fitting garment and the key to unlocking both comfort and style. A dress shirt that fits correctly in the neck and sleeves doesn’t just look better; it feels better. A collar that is too tight can be restrictive and uncomfortable throughout the day, while one that is too loose looks sloppy and unprofessional. Similarly, sleeves that are the wrong length can ruin the entire silhouette of a suit or jacket worn over top.

When you invest in a high-quality garment, you want to showcase its superior craftsmanship and fabric. An impeccable fit does just that. It allows the shirt to drape correctly across your shoulders and torso, highlighting the quality of the material and the precision of the cut. Taking the time to get your measurements right ensures you fully benefit from the garment’s design, making you look more put-together and confident. The true cost of a premium shirt includes the value you get from a perfect fit, which extends its wearability and your satisfaction.

“The difference between a good outfit and a great one often comes down to millimeters. Taking your own neck and sleeve measurements is the single best thing you can do to elevate your style and ensure your investment in premium clothing pays off every time you get dressed.”
Tools You’ll Need for an Accurate Dress Shirt Measurement
Gathering the right tools before you begin is essential for achieving precise and reliable results. Fortunately, you don’t need a professional tailor’s kit. The process is straightforward, and you likely have most of what you need at home already. The most crucial item is a flexible measuring tape.
Here are the simple tools that will guarantee an accurate measurement for your next dress shirt:
- Flexible Tailor’s Measuring Tape: This is non-negotiable. A soft, flexible tape made of vinyl or fiberglass can wrap smoothly around your body’s contours. Do not use a metal retractable tape measure, as it will not provide an accurate reading.
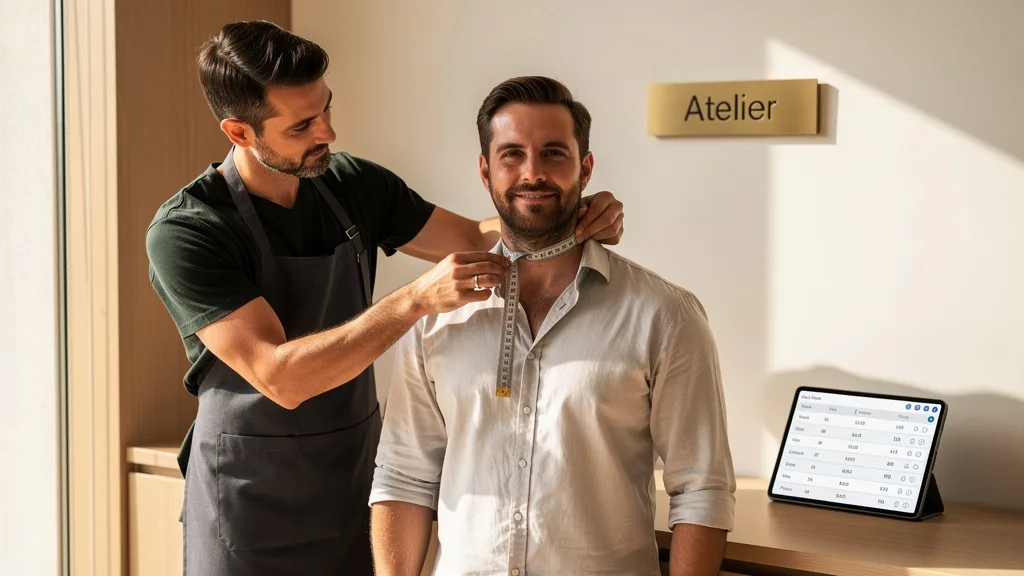
- A Friend (Optional but Recommended): While you can measure your own neck, getting an accurate sleeve measurement by yourself is tricky. Asking a friend or family member for a moment of their time will yield a much more precise result.
- Pen and Paper or a Smartphone: Don’t rely on memory. Jot down your measurements immediately to avoid confusion later. Be sure to note which number is for the neck and which is for the sleeve.
- Natural Posture: Stand up straight but relaxed. Don’t puff out your chest or suck in your stomach. Just stand as you normally would for the most accurate representation of your body.
How to Measure Your Neck for a Dress Shirt: A Step-by-Step Guide
The neck measurement determines your collar size, which is arguably the most important aspect for comfort in a dress shirt. A collar that is too tight feels constricting, while one that is too loose looks unkempt. Following these simple steps will ensure you find the perfect balance for all-day comfort and a sharp appearance.

Step 1: Position the Measuring Tape Correctly
To begin, stand in front of a mirror to ensure you can see the placement of the tape. Hold the flexible measuring tape and wrap it around the base of your neck. The correct position is just below your larynx, more commonly known as your Adam’s apple. This is typically where the collar of a dress shirt would naturally sit.
Ensure the tape is level all the way around and not angled up or down in the back. It should rest gently on your skin without digging in. Keeping the tape parallel to the floor is crucial for an accurate reading. Avoid pulling it tight at this stage; the goal is simply to find the raw circumference of your neck at the correct position.
With the tape positioned correctly, look straight ahead, not down at the tape, as this can alter the measurement. The tape should be snug against your skin but not tight enough to cause any indentation or discomfort. You are measuring the size of your neck, not trying to constrict it.
Read the number where the end of the tape meets the rest of the strip. This number is the actual circumference of your neck. It’s a good practice to take the measurement twice to ensure consistency. Write this number down immediately so you don’t forget it.
Step 3: Add Room for Comfort and Fit
The number you just recorded is your neck’s actual size, but it is not your final shirt collar size. A shirt with a collar of that exact dimension would be uncomfortably tight. To ensure a comfortable fit that allows for breathing and movement, you need to add a small amount of ease.
The standard industry practice is to add half an inch (0.5″) or about 1.25 cm to your raw neck measurement. An easy way to check this is to place one or two fingers (but not more) between the measuring tape and your neck. The tape should feel secure but not choking. The resulting number, your neck circumference plus the comfort allowance, is the collar size you should look for when shopping for a shirt.
How to Measure Your Sleeve Length for a Perfect Drape
Sleeve length is a critical measurement that dictates how a shirt looks, both on its own and when worn under a jacket or sweater. Sleeves that are too short can look boyish and ill-fitting, while sleeves that are too long will bunch up at the wrist and look sloppy. Unlike a pants inseam, a shirt sleeve measurement is not taken from the armpit.

Step 1: Find Your Starting Point at the Neck
The correct starting point for a dress shirt sleeve measurement is a common point of confusion. It does not start at the shoulder seam. Instead, you must begin at the center of the back of your neck. You can find this spot by feeling for the prominent bone at the base of your neck where it meets your shoulders.
Place the end of the flexible measuring tape firmly on this point. This standardized starting position ensures that the measurement accounts for the width of your shoulder, which is crucial for allowing a full range of motion without the cuff pulling up your arm.
Step 2: Trace the Tape Along Your Arm
From the center of your neck, run the measuring tape across the top of your shoulder. Continue down the length of your arm, over your elbow, and all the way to your wrist. It is important to have a slight bend in your arm during this step to ensure the sleeve will be long enough when you move.
This is the part of the process where having a friend help is invaluable. It is very difficult to hold the tape in place at the back of your neck while accurately tracing the path down your own arm. A helper can ensure the tape follows the correct contour and doesn’t slip. The tape should follow the outside of your arm, not the inside.
Step 3: Record the Final Sleeve Measurement
The measurement ends at the point on your wrist where you would like the shirt cuff to sit. For most people, this is at the prominent wrist bone or just slightly past it. This ensures that about a quarter to a half-inch of the shirt cuff is visible when wearing a jacket.
Read the number on the tape at this final point and round up to the nearest half-inch or whole inch, as most shirt sleeves are sold in whole or dual sizes (e.g., 34/35). Write this number down, clearly labeling it as your sleeve length. Congratulations, you now have the two most important measurements for buying a dress shirt that fits perfectly.
Common Mistakes to Avoid When Measuring for a Shirt
Even with the best intentions, small errors during the measurement process can lead to a poor fit. Being aware of these common pitfalls is the first step to avoiding them. A few simple checks can save you the hassle of returns and ensure your next shirt fits like a glove.

Measuring Too Tightly or Too Loosely
One of the most frequent errors is pulling the measuring tape too tight or leaving it too slack. When measuring your neck, the tape should be snug enough to stay in place but loose enough that you can comfortably slip one or two fingers underneath. Any tighter, and the collar will choke you; any looser, and you’ll have a noticeable gap.
For the sleeve, the tape should lie flat against your arm’s contour without digging into your skin. If you pull it too taut, you’ll end up with a measurement that’s too short, resulting in sleeves that ride up your arms every time you move. Consistency and a gentle touch are key.
Using an Old or Stretched Measuring Tape
It may seem like a minor detail, but the condition of your measuring tape matters. Over time, especially with frequent use, vinyl and fiberglass tapes can stretch. An old, stretched-out tape can easily add an inch or more to your measurements, leading you to buy shirts that are far too large.
Before you start, inspect your tape for any signs of wear, stretching, or cracking. If you’re unsure, compare it against a rigid ruler. Investing in a new, high-quality tailor’s tape is a small price to pay for the accuracy it provides. For more on measurement tools, you can consult authoritative guides on metrology. A good measuring tape is an essential tool for anyone who shops for clothes online.
Not Standing in a Natural Posture
Your posture has a significant impact on your measurements. If you slouch, your sleeve measurement may come out too long. Conversely, if you puff out your chest or hold your shoulders back unnaturally, your measurements will be skewed and won’t reflect how you’ll actually wear the shirt.
Stand up straight but in a relaxed, natural position. Let your arms hang comfortably at your sides, with only a slight bend at the elbow for the sleeve measurement. Breathe normally. The goal is to measure your body as it is, not as you think it should be. This ensures the shirt will fit comfortably during your everyday activities.
Translating Your Measurements to a Dress Shirt Size Chart
Once you have your accurate neck and sleeve measurements, the final step is to translate them into a shirt size. It’s important to remember that sizing can vary slightly between brands. Always consult the specific size chart for the retailer or brand you are purchasing from. Our grey shirt combination guide shows how a great fit is key, regardless of color.

Your neck measurement (including the added half-inch for comfort) typically corresponds directly to the shirt’s collar size. For example, if your final neck measurement is 16.5 inches, you will look for a shirt with a 16.5 collar. Sleeve lengths are often sold in ranges, such as 32/33 or 34/35. If your measurement is 34 inches, a 34/35 sleeve will provide an excellent fit. Below is a sample chart to help you visualize how these measurements translate.
| Your Neck Measurement | Shirt Collar Size | Your Sleeve Measurement | Shirt Sleeve Size | Common Size Label |
|---|---|---|---|---|
| 14″ – 14.5″ | 14.5 | 31″ – 32″ | 32/33 | Small (S) |
| 15″ – 15.5″ | 15.5 | 32″ – 33″ | 32/33 | Medium (M) |
| 16″ – 16.5″ | 16.5 | 33″ – 34″ | 34/35 | Large (L) |
| 17″ – 17.5″ | 17.5 | 34″ – 35″ | 34/35 | Extra Large (XL) |
| 18″ – 18.5″ | 18.5 | 35″ – 36″ | 36/37 | XX-Large (2XL) |
Key Takeaways
Mastering your shirt measurements is a simple skill that pays dividends in style and comfort. By focusing on a few critical details, you can confidently shop for premium dress shirts online. Here are the most important points to remember:
- Neck Comfort is Key: Always add a half-inch (or allow for one to two fingers of space) to your raw neck measurement to ensure the collar isn’t too tight.
- Start Sleeves at the Center: The sleeve measurement for a dress shirt always begins at the center of the back of your neck, not the shoulder.
- Use the Right Tools: A flexible, non-stretched tailor’s tape is essential. Avoid rigid rulers or old, worn-out tapes.
- Posture Matters: Stand naturally and relaxed to get a measurement that reflects your true fit.
- Check the Brand’s Chart: Always cross-reference your measurements with the specific brand’s size chart before purchasing, as sizing can vary.
- Ask for Help: Don’t hesitate to ask a friend for assistance, especially for the sleeve measurement, to ensure maximum accuracy.
Frequently Asked Questions
Even with a detailed guide, you might still have a few questions. Here are answers to some of the most common queries about measuring for a dress shirt.
What if my measurements fall between two standard shirt sizes?
If your measurements are between sizes, it’s generally best to size up, especially for the neck. A slightly loose collar is far more comfortable and less noticeable than one that is too tight. For sleeve length, you can often have a tailor make a minor adjustment if needed, but choosing the longer of two options is typically the safer bet.
How often should I remeasure myself for dress shirts?
It’s a good idea to remeasure yourself once a year or anytime you experience a significant change in weight. Our bodies can change over time, and relying on old measurements is a common cause of ill-fitting clothes. Taking a few minutes to check your measurements before a new purchase ensures a consistent, perfect fit.
Can I accurately measure myself without a flexible tape measure?
While you can use a piece of string or a charging cable and then measure it against a rigid ruler, this method is highly prone to error. The string can stretch, and it’s difficult to hold it steady and mark the exact spot. A flexible tailor’s tape is an inexpensive and worthwhile investment for anyone who wants to buy well-fitting clothes online.
Is it better to have someone help me measure my sleeve length?
Yes, absolutely. While it’s possible to do it yourself, it is very difficult to keep the tape anchored at the center of your neck while extending your arm and reading the measurement at your wrist. Having a friend or family member assist you will almost certainly result in a more accurate and reliable sleeve measurement.
How do neck and sleeve measurements relate to fit types like slim or classic?
Neck and sleeve measurements determine the fundamental size of the shirt’s frame. Fit types like slim, classic, or regular refer to the cut and shape of the shirt’s torso. A shirt with a 16.5″ neck and 34/35″ sleeve will be available in a slim fit (tapered at the waist), a classic fit (more generous through the chest and waist), or a regular fit. Your neck/sleeve size remains the same, but you choose the fit type based on your body shape and style preference. Understanding this is similar to knowing the difference between a drop shoulder t shirt vs regular fit.
Conclusion
Learning how to measure your neck and sleeve for a premium dress shirt is a simple yet powerful skill that empowers you to shop with confidence. By following the step-by-step guides for the neck and sleeve, avoiding common mistakes, and understanding how to read a size chart, you can eliminate the guesswork and frustration of online shopping. The perfect fit is no longer a matter of luck but a result of your own precision.
The key takeaways are straightforward: use a flexible tape, start the sleeve measurement from the center of your neck, and always add a little room for comfort in the collar. These actions ensure that the premium quality and thoughtful design of your chosen shirt are perfectly showcased. A well-fitting shirt not only enhances your appearance but also boosts your confidence, allowing you to feel as good as you look.
Now that you are equipped with your precise measurements, you are ready to explore a world of perfectly fitting apparel. You can confidently select garments that are designed to fit your body, not just a generic size label. This knowledge is the first step toward building a wardrobe of high-quality, comfortable, and stylish pieces.
Explore our collection of premium dress shirts, crafted with precision and designed for the perfect fit. With your accurate measurements in hand, you’re ready to discover the difference quality makes. Find your new favorite shirt today. SHOP NOW.